


Polaris has created an entire “Xtreme Performance” UTV industry with the legendary RZR XP 1000. Its initial release coupled amazing handling with a 107 HP, naturally aspirated motor, and they sold them in record numbers. In 2015, the XP received a few small updates and slight valve train improvements, bringing the power to a class leading 110 HP. The XP continued to sell like crazy until Polaris completely rewrote the rulebook with the factory supercharged RZR XP Turbo putting down 144 HP in 2016, and then even turning that up to 168 HP the following model year. In not so many words, Polaris dropped a class leading, top selling UTV, and then has them making over 60% more HP in just three years’ time.
An XP Turbo putting down an extra 60 HP within virtually the same RZR chassis is pretty dang awesome, that is unless you’re one of the tens of thousands of Polaris customers that already bought an XP 1000 before the Turbo’s release. Many loyal Polaris RZR customers traded in their machines in favor of the new turbocharged options, but many are still driving their XP 1000s. If you’re attached to your very own personal XP 1000, but want the power to run with the latest and greatest turbocharged UTV’s, KraftWerks has the answer. Leaders in the muscle car and Harley Davidson Supercharger scene, they have developed a turnkey, bolt-on RZR XP kit that reliably makes over 150 HP and 110 lb-ft of torque. The 150 HP KraftWerks kit with the 7.5 PSI pulley is proving to be reliable enough for Off-Road racing, and they have a 9 PSI pulley available for 170 HP, and even a 15 PSI drag pulley, capable of a lot more with bigger clutches and injectors.
We just installed the 150 HP, 7.5 PSI kit on our 2014 RZR, with unbelievable performance gains. With zero turbo lag, and turbo equivalent power, it truly runs as well as, or better than any of the newer turbo UTVs. The KraftWerks kit is a well thought out, complete bolt on kit, and just requires re-clutching your stock clutch with new weights and springs. You will also need an ECU flash tuner, and they recommended the Dynojet PCX tuner as they have developed many different custom personalized tunes for the KraftWerks kit. This how-to won’t show you every single step, as the install is pretty in-depth, but it should showcase how it is truly something that the average, mechanically inclined UTV enthusiast, or backyard mechanic is capable of installing it. Installation requires basic hand tools, and should take you somewhere between 5-8 hours.
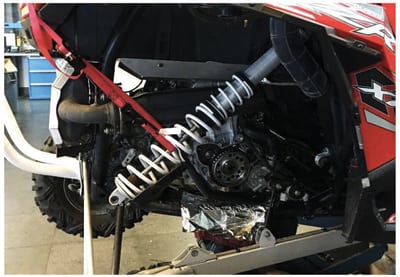
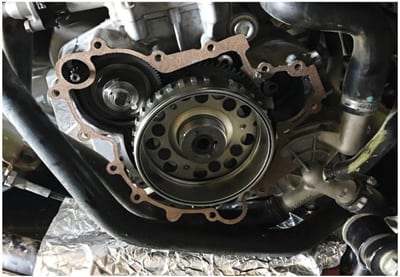
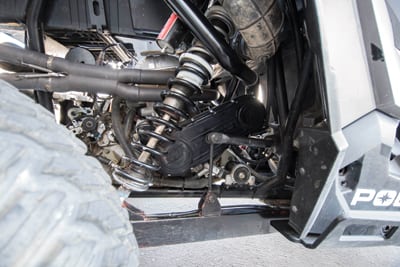
Starting with a clean machine, disconnect battery and then jack the rear of the car up until the wheels are hanging, and put it on jack stands. Remove the rear passenger wheel and the lower shock bolt, and use a tie down to pull it back out of the way. Use aluminum foil to create a drip catch for the motor oil, and then remove the stock stator cover. You can also remove the stock intake manifold and piping and the clutch cover with vent tube. You will also cut out and remove a 6”x6” piece of the stock heat shield.
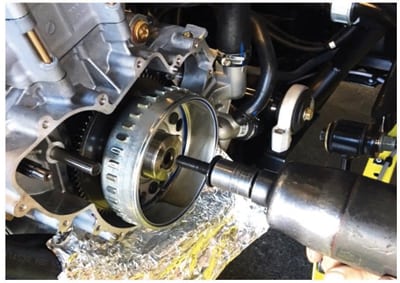
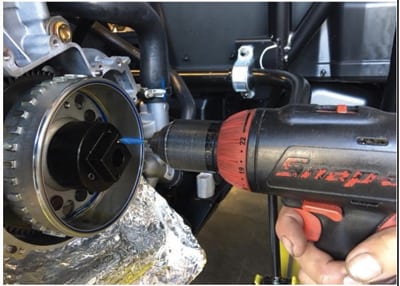
With the stator cover removed, use a razor blade to clean off any old gasket that is left stuck to the engine case. Once it’s clean, use an impact gun and a 19mm to remove the stock crankshaft bolt.
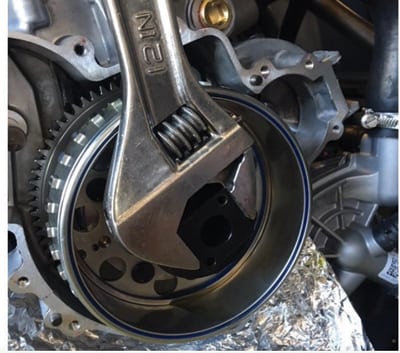
Attach the Crank Pin Drill assembly template with a crescent wrench. Ensure that it’s snug, but not overnight.
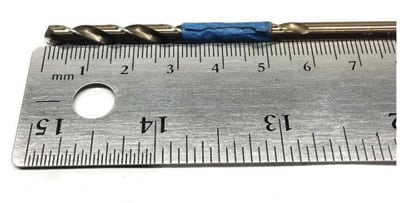
Use a 3/16” drill bit, mark it off with masking tape or a paint pen 31 mm from the tip. This will be a depth gauge when drilling.
Carefully drill the crank through the holes on the threaded on template, or pin locator drill jig. Only drill 4 mm into the crank, and be careful not to go to deep.
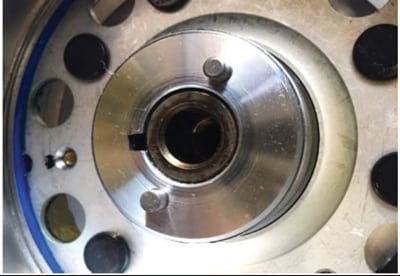
De-bur the holes you have drilled, and then install the locator pins with a dab of silicone to hold them in place.
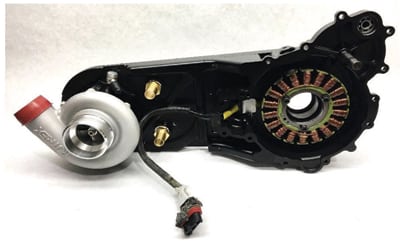
Remove the stock stator from the stock stator cover and install into the Main Supercharger drive assembly with the Rotrex head unit. Be sure to install the gem wire harness bracket and rubber bushing, along with the stator into the new housing.
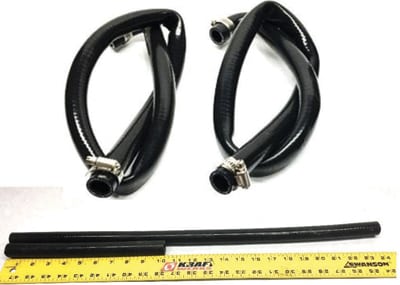
Locate the two long silicone hoses with angled ends. Cutting from the straight end, you will cut 10” from one, and 24” from the other.
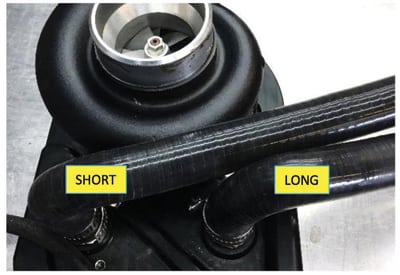
Attach these hoses to the brass fittings on the main supercharger bracket. The short hose attaches to the bottom fitting and the long hose to the top fitting. Use hose clamps to secure.
Install the supplied gasket with a few dabs of RTV Silicone for easier install.
Install the main supercharger bracket assembly to the motor, and torque all the M6 bolts to 8 ft. /lbs.
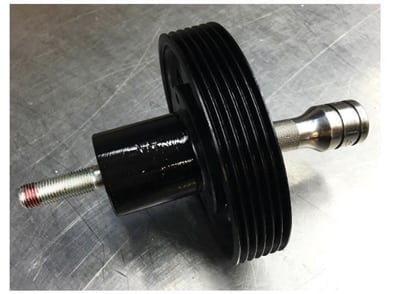
Locate the crankshaft pulley assembly and the new crankshaft bolt and crush washer. Oil the hub section and apply red thread locker to the bolt threads.
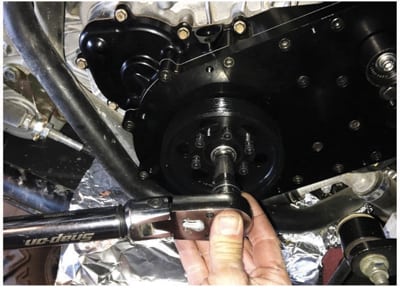
Install the crankshaft pulley by pushing it through seal and into the supercharger bracket. Torque the new crankshaft bolt to 95 ft. /lbs., but do not use an impact on this bolt.
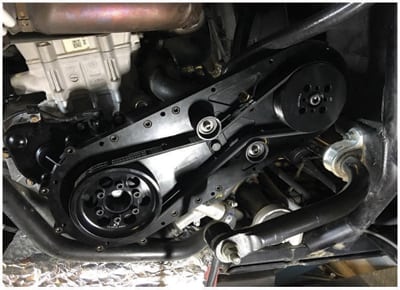
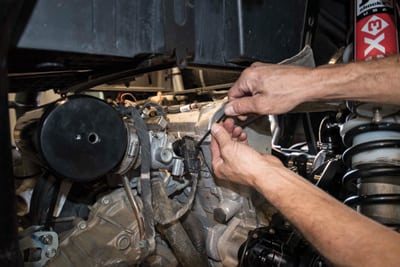
Remove the tensioner pulley, install the supercharger drive belt, making sure the grooves are properly seated, and that it’s routed as shown in the picture. Re-install the tensioner pulley.
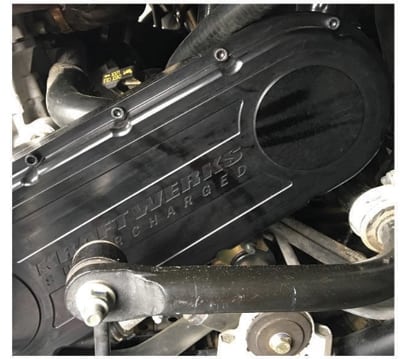
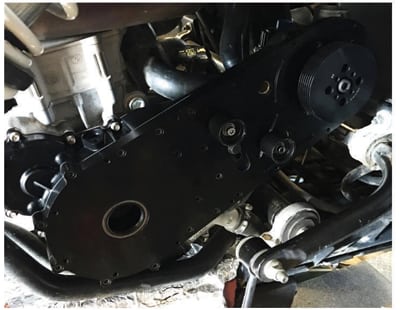
Install the Supercharger belt cover plate using a dab of RTV on its gasket to keep it in place. Install the 6x10mm Allen bolts. Re-install the crank trigger sensor.
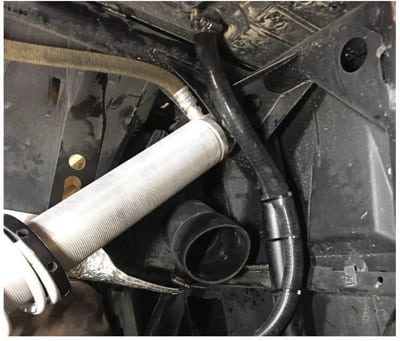
Route the lower fitting hose to the coupler and the small breather that installs through the stock hole in the bed.
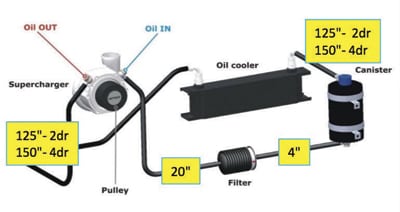
Pay attention to the Rotrex oil cooler oil line routing. For a front mounted oil cooler, you will need the two long lines to run up front. If you are mounting it in the back, they will be significantly shorter.

Mount the Rotrex Oil Reservoir assembly to the driver seat belt bolt with red thread locker.
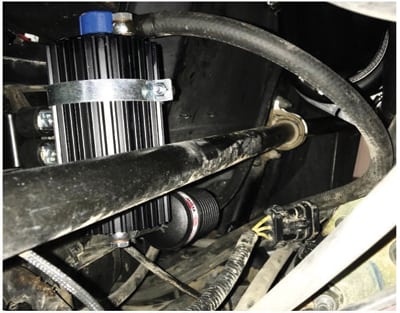
Attach the oil line from the top fitting to the oil cooler, the oil line from the bottom fitting will have the oil filter.
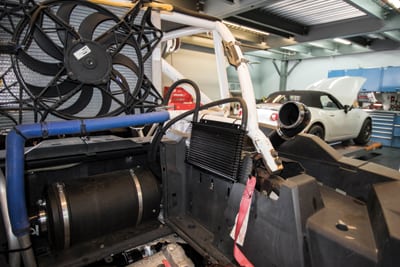
In our case, our car’s radiator is relocated to behind the driver’s head, and we’ll be mounting the oil cooler in the back truck box area as well.
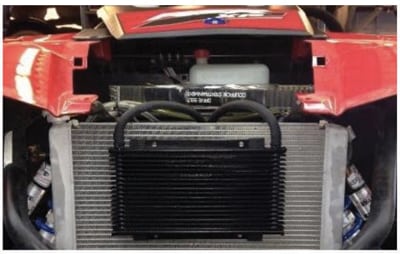
When installing with a stock located radiator, you will mount the oil cooler to the front of it, behind the plastic bumper. Some trimming is required, but they supply a simple template.
Install the Custom Intake Manifold to the OEM Throttle Bodies and secure to the engine mount. Re-install the map sensor, the vacuum assembly, and the secondary map sensor.
Line up the passenger and driver side charge pipe assemblies to double check hole location before cutting them.
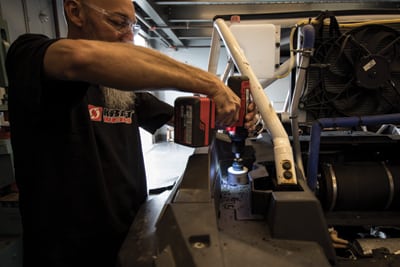
Use a 3” hole saw to cut the holes in both the driver and passenger side bed locations. Be sure to double check charge pipe location before cutting the hole.

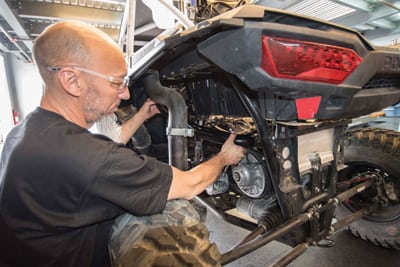
Install the intercooler charge pipe assemblies on both the driver and passenger sides.
The passenger side charge pipe should route something like shown.
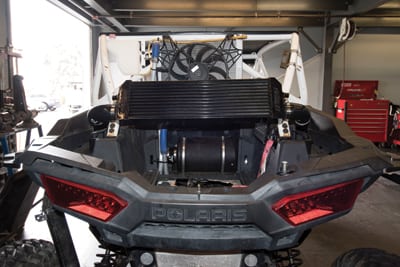
Install the intercooler with the supplied billet mounting brackets. Brackets are supplied for both stock and aftermarket cages, but ours would require a couple of new tabs, as we were having to work around the relocated radiator that was also mounted behind the seats.
Install Note: We left out a few hoses and other pieces but the instruction sheet lays everything out with great photos and very good detail. You will have to prime the Rotrex Oil Reservoir system with Rotrex SX 150 Traction fluid and re-flash the ECU with a Dynojet PCX for proper tuning. Clutching is also required but KraftWerks can set you up with a really close starting point depending on your overall set-up.


